반응형
1. RadioListTile 설명
RadioListTile은 ListTile에 라디오 버튼이 달린 위젯입니다.
ListTile의 leading에 Radio를 넣어서 비슷하게 만들 수도 있습니다.
[전체소스]
import 'package:flutter/material.dart';
void main() {
runApp(MyApp());
}
class MyApp extends StatelessWidget {
// This widget is the root of your application.
@override
Widget build(BuildContext context) {
return MaterialApp(
title: 'Flutter Demo',
theme: ThemeData(
primarySwatch: Colors.blue,
),
home: MyHomePage(),
);
}
}
class MyHomePage extends StatefulWidget {
@override
_MyHomePageState createState() => _MyHomePageState();
}
class _MyHomePageState extends State<MyHomePage> {
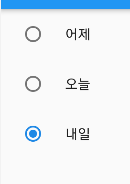
List<String> _nameList = ["어제","오늘", "내일"];
String _selectName = "";
@override
Widget build(BuildContext context) {
return Scaffold(
appBar: AppBar(
title: Text("1a2a"),
),
floatingActionButton: FloatingActionButton(
child: Icon(Icons.add),
onPressed: () { },
),
body: Center(
child:ListView.builder(
itemCount: _nameList.length,
itemBuilder: (BuildContext context, int index){
return RadioListTile<String>(
title : Text(_nameList[index]),
value: _nameList[index],
groupValue: _selectName,
onChanged: (value){
print(value);
setState(() {
_selectName = value??"";
});
});
}),
),
);
}
}
[결과화면]
2. RaidoListTile활용
이걸 팝업에 넣어 보겠습니다.
아래처럼 하면 라디오 버튼이 변경되지 않습니다.
AlertDialog은 StatelessWidget 이기 때문입니다.

[타일의 라디오버튼이 오동작하는 소스]
_displayMyDialog(){
  showDialog(
    context: context,
    builder: (context){
      return AlertDialog(
        title: Text("선택"),
        content: Container(
          width: 400,
          height: 300,
          child: ListView.builder(
              itemCount: _nameList.length,
              itemBuilder: (BuildContext context, int index){
                return RadioListTile(
                  value: index,
                  groupValue: _selectIndex,
                  title: Text(_nameList[index]),
                  onChanged: (value) {
                  },
                );
              }),
        ),
        actions: [
          ElevatedButton(
              onPressed: (){
                setState(() {
                  Navigator.pop(context);
                });},
              child:Text("Cancel") )
        ],
      );});
}
해결방법은 위 소스의 AlertDialog의 content 부분을 StatefulWidget으로 만들어주는 것입니다.
두가지 방법이 있습니다.
1. 따로떼어내서 StatefulWidget 으로 만드는방법
2. StatefulBuilder를 사용하는 방법
아래처럼 두 부분으로 나누었습니다. 참고로 이번에는 RadioListTile의 제네릭에 int를 적용해 보았습니다.
1. 따로떼어내서 StatefulWidget 으로 만드는방법
[따로 때어내 StatefulWidget으로 만들기]
class MyAlertDialogContent extends StatefulWidget{

  List<String> nameList;

  MyAlertDialogContent(this.nameList);

  @override
  _MyAlertDialogContentState createState()=> _MyAlertDialogContentState();
}


class _MyAlertDialogContentState extends State<MyAlertDialogContent>{

  int _selectIndex=0;
  @override
  Widget build(BuildContext context) {
    return Container(
      width: 400,
      height: 300,
      child: ListView.builder(
          itemCount: widget.nameList.length,
          itemBuilder: (BuildContext context, int index){
            return RadioListTile<int>(
              value: index,
              groupValue: _selectIndex,
              title: Text(widget.nameList[index]),
              onChanged: (value) {
                setState(() {
                  _selectIndex = value??0;
                });
              },
            );
          }),
    );
  }
}
[떼어낸 위젯 호출]
_displayMyDialog(){
  showDialog(
    context: context,
    builder: (context){
      return AlertDialog(
        title: Text("선택"),
        content: MyAlertDialogContent(_nameList),
        actions: [
          ElevatedButton(
              onPressed: (){
                setState(() {
                  Navigator.pop(context);
                });},
              child:Text("Cancel") )
        ],
      );});
}
2. StatefulBuilder를 사용하는 방법
참고로 이번에도 따로때어낸경우와 비슷하게 RadioListTile의 제네릭에 int를 적용해 보았습니다
[StatefulBuilder를 사용하는 방법]
_displayMyDialog2() {
  showDialog(
      context: context,
      builder: (context) {
        return StatefulBuilder(
            builder: (BuildContext context, StateSetter setState) {
              return AlertDialog(
                title: Text("방법2"),
                content: Container(
                  width: 400,
                  height: 300,
                  child: ListView.builder(
                      itemCount: _nameList.length,
                      itemBuilder: (BuildContext context, int index) {
                        return RadioListTile<int>(
                          value: index,
                          groupValue: _selectIndex,
                          title: Text(_nameList[index]),
                          onChanged: (value) {
                            setState((){
                              _selectIndex = value??0;
                            });
                          },
                        );
                      }),
                ),
                actions: [
                  ElevatedButton(
                      onPressed: () {
                        setState(() {
                          Navigator.pop(context);
                        });
                      },
                      child: Text("Cancel"))
                ],
              );
            });
      });
}
'flutter.widget' 카테고리의 다른 글
| Drawer (0) | 2021.04.14 |
|---|---|
| AlertDialog (0) | 2021.04.13 |
| RefreshIndicator (0) | 2021.04.08 |
| FractionallySizedBox (0) | 2021.04.06 |
| image (0) | 2020.11.30 |